1 Counter App 구성

- +,- 버튼을 만들어서 각각의 버튼이 눌렸을 때 plus one?, minus one? 알림을 띄우고
- currentValue라는 UILabel에 값이 반영 되도록 해보자
- 일단 코드에 currentValue 변수 생성 후 0으로 값 초기화
//  ViewController.swift
//  counter app

import UIKit

class ViewController: UIViewController {

    var currentValue = 0

    override func viewDidLoad() {
        super.viewDidLoad()
        // Do any additional setup after loading the view.
    }


    @IBAction func plusAlert(_ sender: Any) {
        let alert = UIAlertController(title: "+", message: "plus one?", preferredStyle: .alert)
        let action = UIAlertAction(title: "OK", style: .default, handler: nil)

        alert.addAction(action)
        present(alert, animated: true, completion: nil)
    }

    @IBAction func minusAlert(_ sender: Any) {
        let alert = UIAlertController(title: "-", message: "minus one?", preferredStyle: .alert)
        let action = UIAlertAction(title: "OK", style: .default, handler: nil)

        alert.addAction(action)
        present(alert, animated: true, completion: nil)
    }
}
2 Outlet 연결하기
- currentValue(UILabel)의 내용을 변경시키기 위해 UILabel을 View Controller와 연결한다.

- UILabel에서 control키를 누른채로 View Controller화면으로 드래그 -> currentValueLabel이라는 이름으로 outlet생성
@IBOutlet weak var currentValueLabel: UILabel!3 Counter App 구현
import UIKit

class ViewController: UIViewController {

    var currentValue = 0

    @IBOutlet weak var currentValueLabel: UILabel!


    override func viewDidLoad() {
        super.viewDidLoad()
        currentValueLabel.text = "count : \(currentValue)"
    }

    @IBAction func plusAlert(_ sender: Any) {
        let alert = UIAlertController(title: "+", message: "plus one?", preferredStyle: .alert)
        let action = UIAlertAction(title: "OK", style: .default, handler: nil)

        alert.addAction(action)
        present(alert, animated: true, completion: nil)

        currentValue += 1
        currentValueLabel.text = "count : \(currentValue)"
    }

    @IBAction func minusAlert(_ sender: Any) {
        let alert = UIAlertController(title: "-", message: "minus one?", preferredStyle: .alert)
        let action = UIAlertAction(title: "OK", style: .default, handler: nil)

        alert.addAction(action)
        present(alert, animated: true, completion: nil)

        currentValue -= 1
        currentValueLabel.text = "count : \(currentValue)"
    }
}
- viewDidLoad() 안에 currentValueLabel.text = "count : \(currentVale)" : 앱 시작시 화면에 currentValueLabel 내용을 수정
- plusAlert 메서드에 currentValue += 1 : 이 메서드가 수행 될 때 currentValue 값 변경
- plusAlert 메서드에 currentValueLabel.text = "count : \(currentValue)" : 이 메서드가 수행 될 때 currentValueLabel 내용을 수정
- 같은 방식으로 minusAlert메서드에 코드 작성
import UIKit

class ViewController: UIViewController {

    var currentValue = 0

    @IBOutlet weak var currentValueLabel: UILabel!


    override func viewDidLoad() {
        super.viewDidLoad()
        refresh()
    }

    @IBAction func plusAlert(_ sender: Any) {
        let alert = UIAlertController(title: "+", message: "plus one?", preferredStyle: .alert)
        let action = UIAlertAction(title: "OK", style: .default, handler: nil)

        alert.addAction(action)
        present(alert, animated: true, completion: nil)

        currentValue += 1
        refresh()
    }

    @IBAction func minusAlert(_ sender: Any) {
        let alert = UIAlertController(title: "-", message: "minus one?", preferredStyle: .alert)
        let action = UIAlertAction(title: "OK", style: .default, handler: nil)

        alert.addAction(action)
        present(alert, animated: true, completion: nil)

        currentValue -= 1
        refresh()
    }

    func refresh() {
        currentValueLabel.text = "count : \(currentValue)"
    }
}
4 Counter App 완성
- 같은 동작을 수행하는 currentValueLabel.text = "count : \(currentValue)" 를 refresh() 메서드로 분리
let action = UIAlertAction(title: "OK", style: .default, handler: {action in self.refresh()})- 이전 코드에서는 plusAlert 메서드가 실행되면, 알림 창이 띄워지고 바로 refresh()로 currentValueLabel이 수정되었다.
- alert가 띄워지고 OK 가 눌린 후에 값이 변경 되는 모습이 자연스럽기 때문에 코드를 수정하자.
- UIAlertAction의 handler 매개변수에 refresh를 closure로 감싸서 전달 -> "OK" 클릭이 수행되면 현재 object의 refresh()함수를 g호출한다.
import UIKit

class ViewController: UIViewController {

    var currentValue = 0

    @IBOutlet weak var currentValueLabel: UILabel!

    override func viewDidLoad() {
        super.viewDidLoad()
        refresh()
    }

    @IBAction func plusAlert(_ sender: Any) {
        let alert = UIAlertController(title: "+", message: "plus one?", preferredStyle: .alert)
        let action = UIAlertAction(title: "OK", style: .default, handler: nil)

        alert.addAction(action)
        present(alert, animated: true, completion: nil)

        currentValue += 1
    }

    @IBAction func minusAlert(_ sender: Any) {
        let alert = UIAlertController(title: "-", message: "minus one?", preferredStyle: .alert)
        let action = UIAlertAction(title: "OK", style: .default, handler: nil)

        alert.addAction(action)
        present(alert, animated: true, completion: nil)

        currentValue -= 1
    }

    func refresh() {
        currentValueLabel.text = "count : \(currentValue)"
    }
}
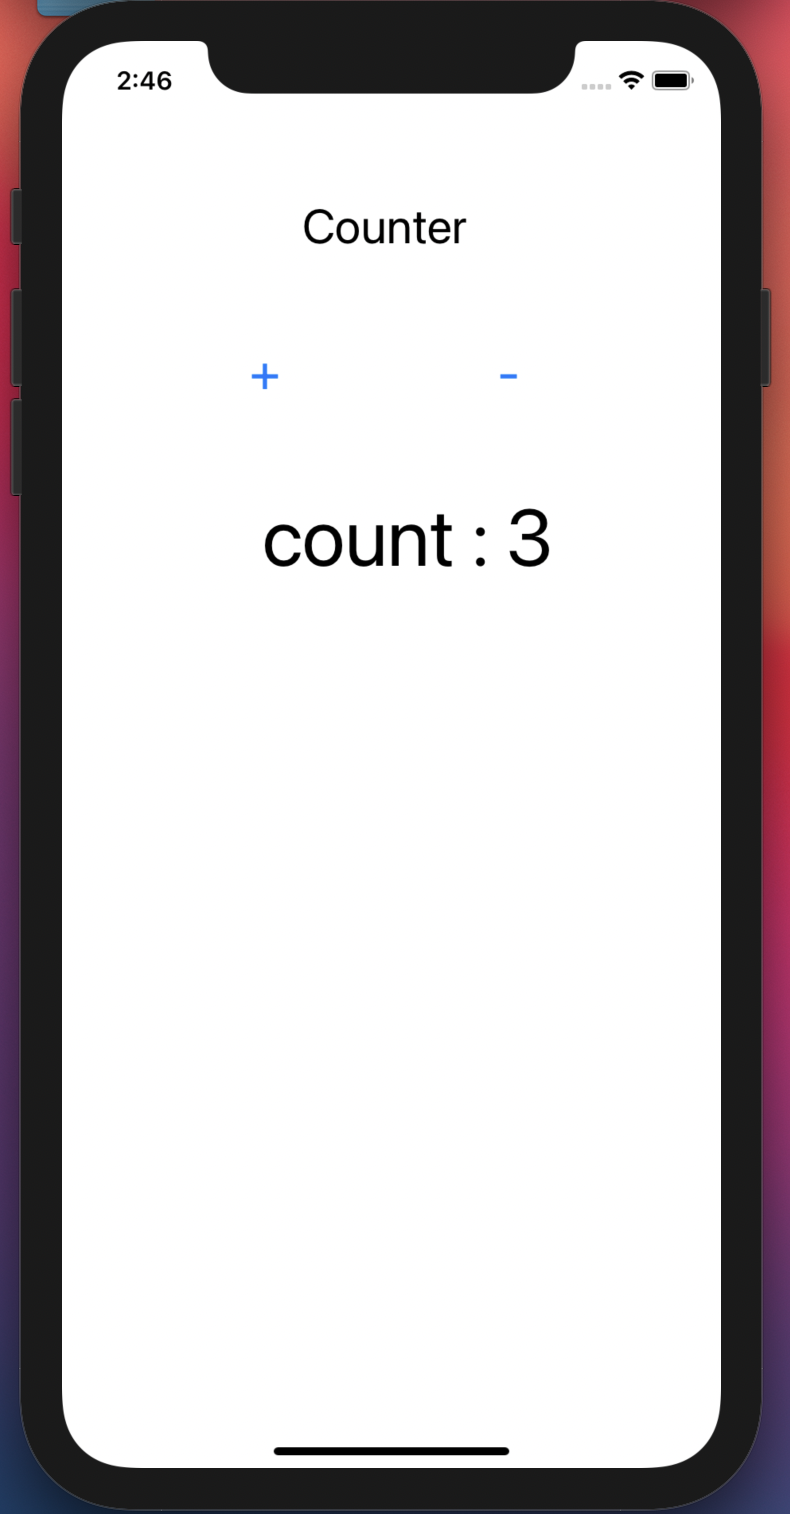
- 실행 후 확인
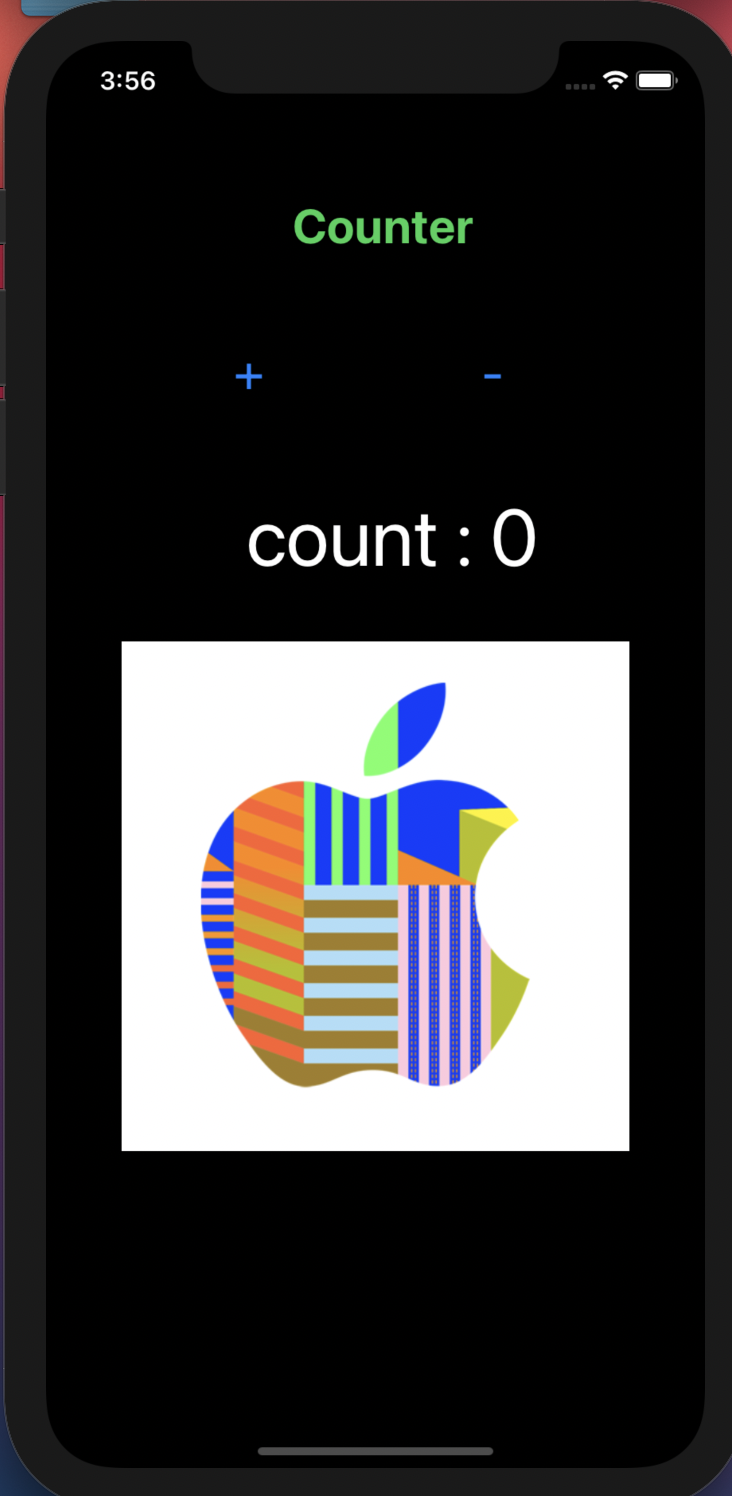
5 Image View
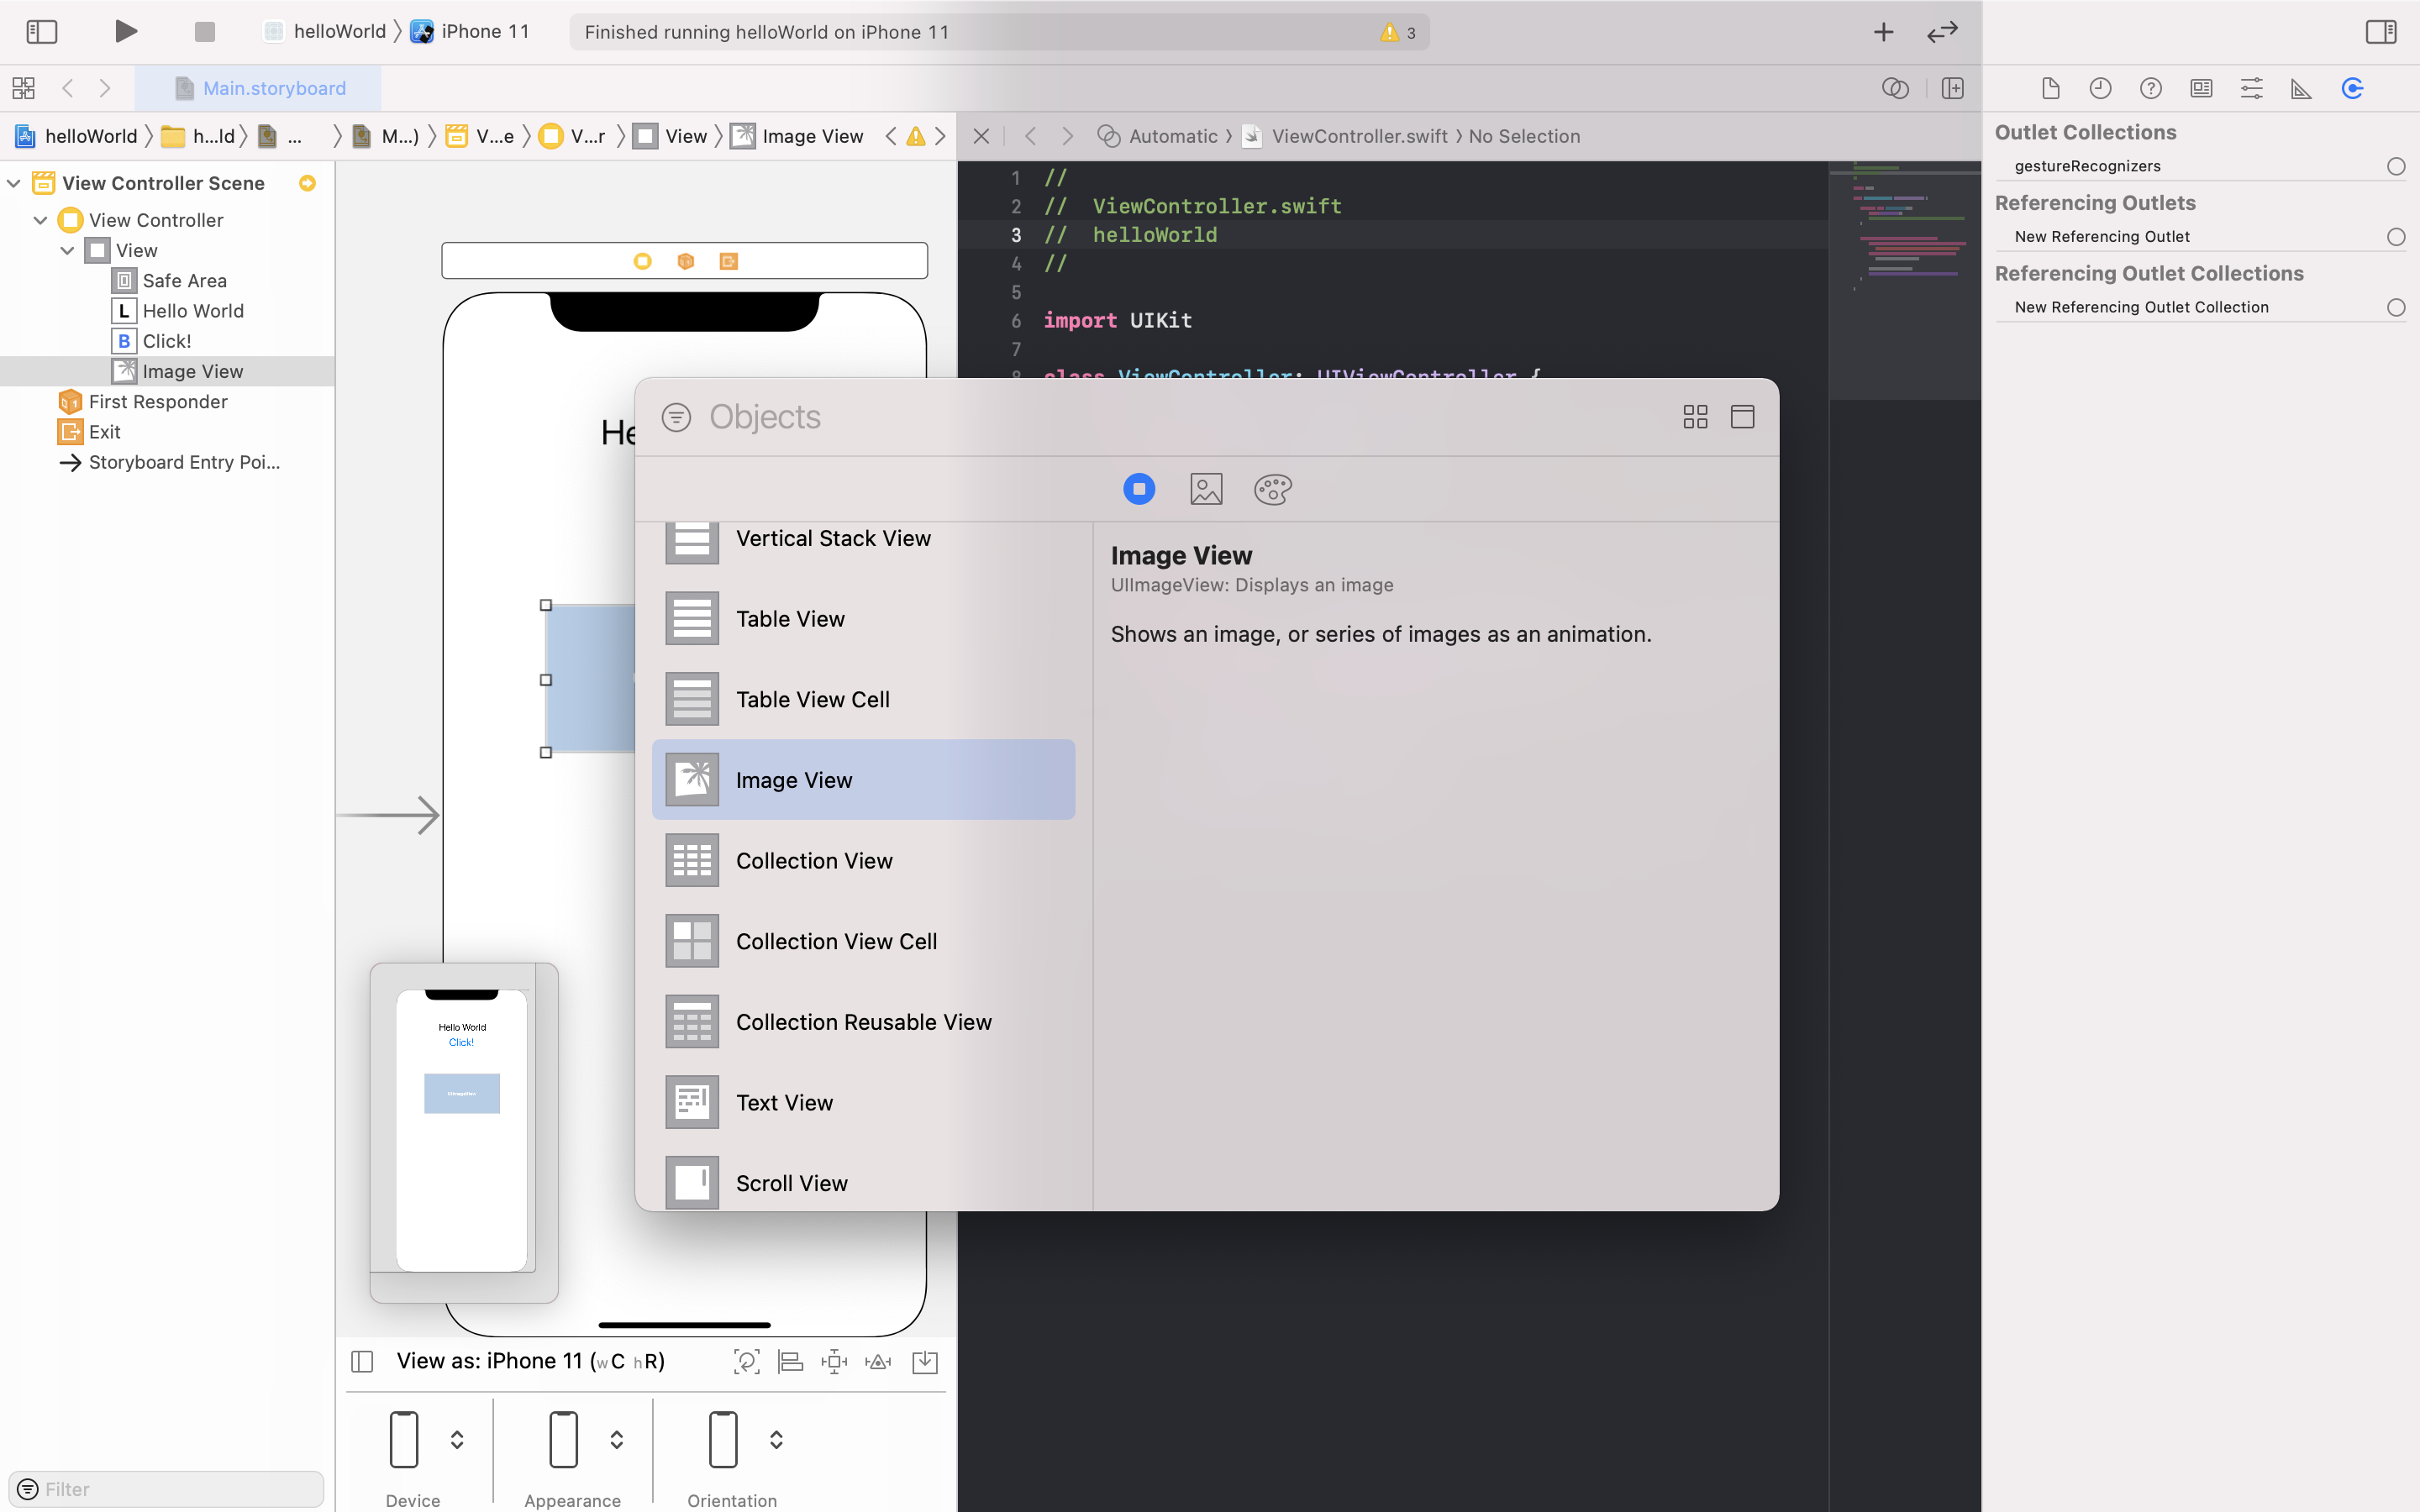
- object library에서 image view를 가져온다
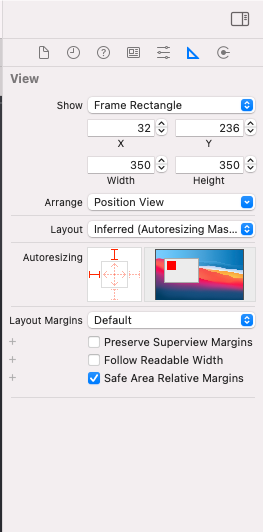
- image view를 선택한 다음 size inspector로 들어가서 width, height을 지정해준다
- x, y 는 현재 view에서의 좌표를 나타낸다.
- 화면의 왼쪽 상단 꼭지점을 (0,0)으로 가로축을 x, 세로축을 y로 한다.
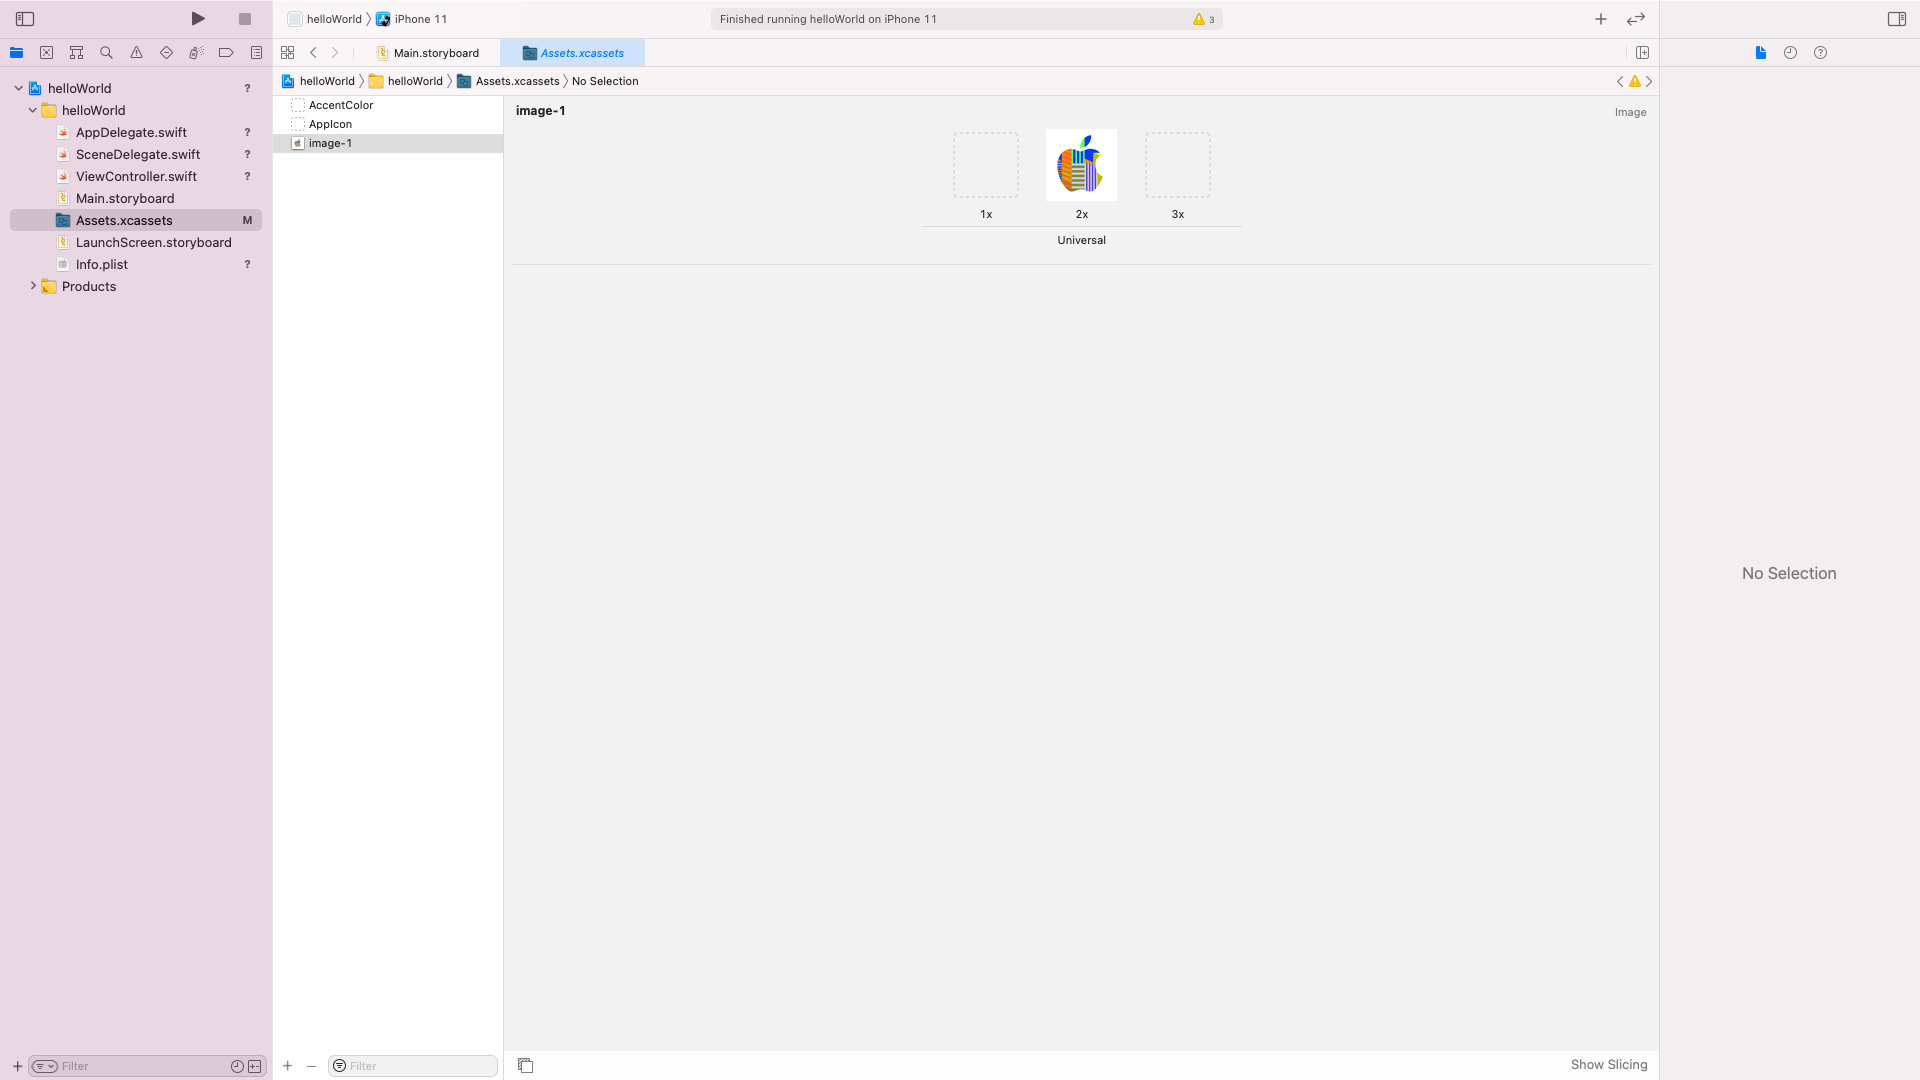
- 좌측 Assets.xcassets 폴더로 이동 -> 가운데에 준비한 image 드래그
- 1x(저화질 용), 2x(retina display용), 3x(초고화질용)는 해상도를 나타낸다
- 이미지 파일 이름 뒤에 @2x 를 적으면 retina display용으로 인식한다.

- 만들어 놓은 image view를 클릭 -> 우측 attribute inspector -> image란에 준비한 이미지 클릭
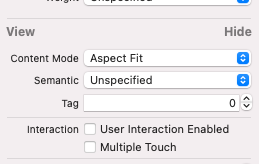
- 그 아래 content mode 에서 이미지를 꽉 채울 것인지, 이미지 가로세로를 유지할 것인지 등 조절 가능

- 실행 후 확인
6 다크 모드


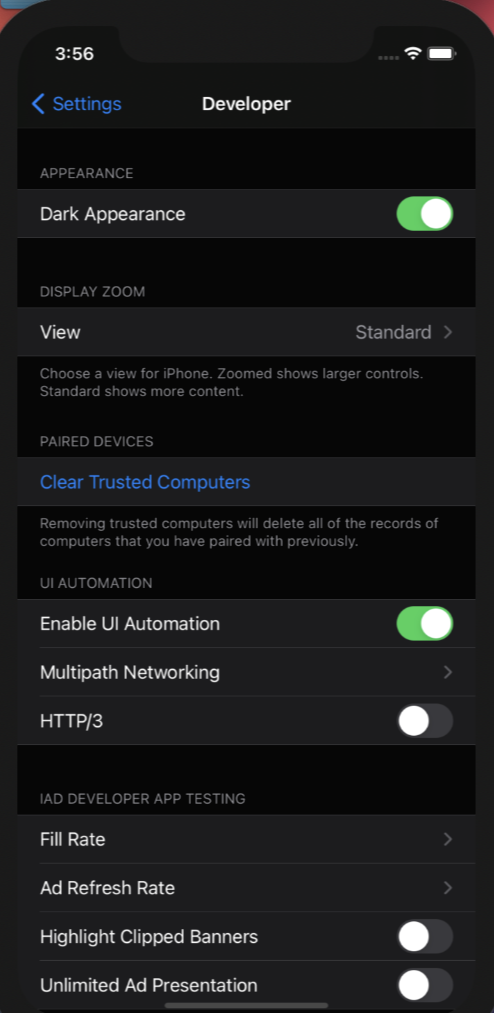
- 설정 아이콘 클릭 -> 맨 아래 Developer 클릭 -> Dark Appearance on
- Label의 글자 색은 attribute inspector에서 변경이 가능하다. xcode에서 제공되는 색으로 설정하면 자동으로 알아서 다크모드에서 잘 보이게 바꿔준다
- 실행 후 확인
'ComputerScience > ios App(Storyboard)' 카테고리의 다른 글
| ios - 6 swift 기본문법(Tuple, Flow Control) (0) | 2021.01.28 |
|---|---|
| ios - 5 Auto Layout, 앱 아이콘, 이름 설정 (0) | 2021.01.28 |
| ios - 3 다음 프로젝트를 위한 기초 지식 (0) | 2021.01.26 |
| ios - 2 Button에 Action 추가하기 (0) | 2021.01.24 |
| ios - 1 Hello World! (0) | 2021.01.22 |


