1 CollectionView
- tableViewCell로 tableView를 구성하면 아래 그림 처럼 한 행을 cell로 하여 여러 항목들을 리스트로 나열할 수 있었다.

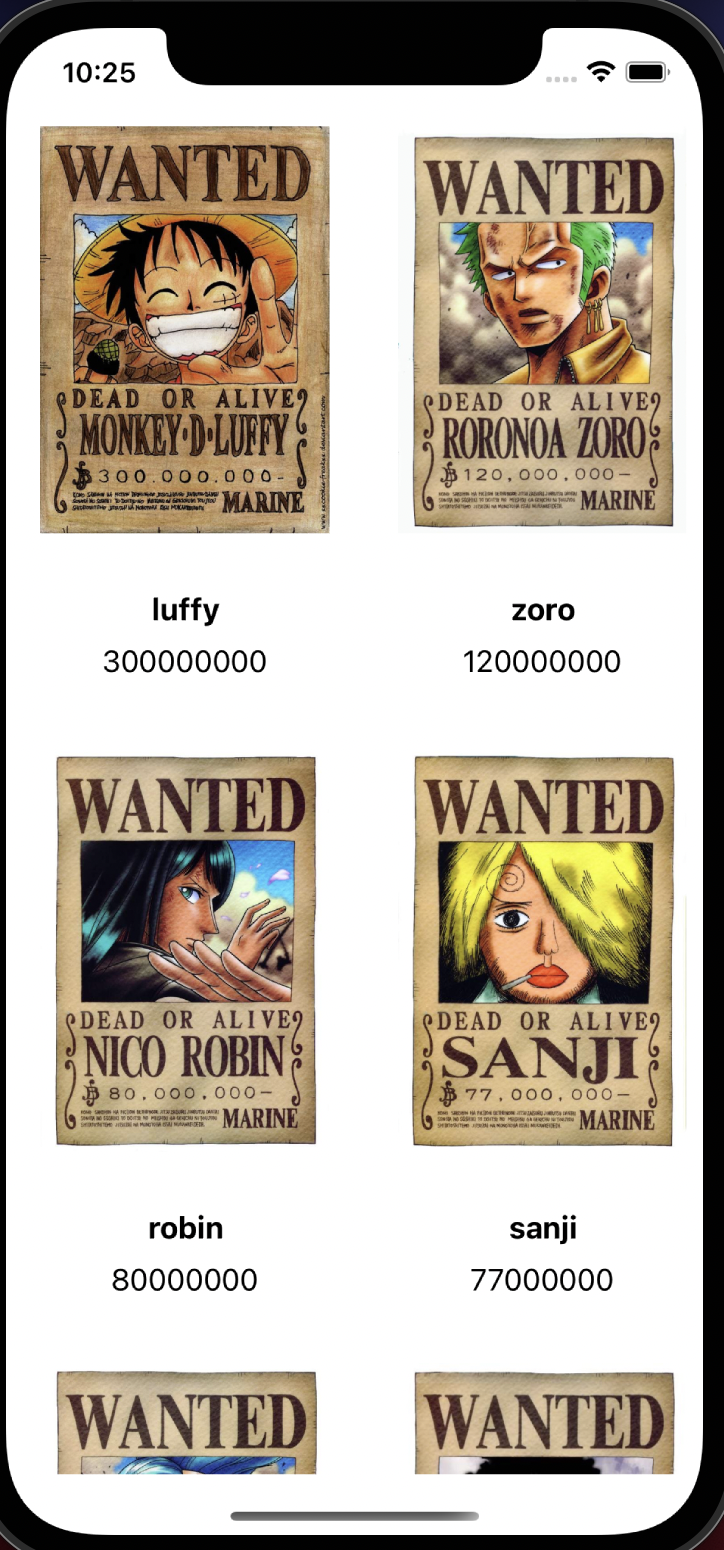
- collectionView를 사용하면 아래 처럼 한 행에 여러 항목들을 표현할 수 있다.

- collectionViewCell로 collectionView를 구성할 것이다.
- 여러 형태의 레이아웃이 가능하기 때문에 tableView와는 다르게 layout을 관리하는 UICollectionViewLayout 객체가 존재한다.
- customizing을 위해서는 위 요소들을 상속하여 다양한 형태로 변형하면 된다.
- 원피스 현상금앱의 현상금 정보들을 tableView 말고 collectionView로 나타내보자


- 기존 tableView를 제거하고 collectionView를 추가한다.
- collectionViewCell을 알맞은 크기로 조정한다.

- collectionViewCell을 UI Component로 채운다.

- collectionView와 해당하는 viewController를 연결한다. datasource와 delegate항목을 연결해줘야 한다.
2 코드작성
import UIKit

class BountyViewController: UIViewController, UICollectionViewDataSource, UICollectionViewDelegate, UICollectionViewDelegateFlowLayout {

    let viewModel = BountyViewModel()
- CollectionView를 위한 protocol들을 상속하여 구현조건을 충족시켜야한다.
- 하나씩 어떤 프로토콜인지 살펴보자.
    // UICollectionViewDataSource
    // 몇개를 보여줄까요?
    func collectionView(_ collectionView: UICollectionView, numberOfItemsInSection section: Int) -> Int {
        return viewModel.numOfBountyInfoList
    }
- collectionView안에 몇개의 collectionViewCell을 넣을 것인지 알려주어야 한다.
// 셀은 어떻게 표현할거야?
    func collectionView(_ collectionView: UICollectionView, cellForItemAt indexPath: IndexPath) -> UICollectionViewCell {

        guard let cell = collectionView.dequeueReusableCell(withReuseIdentifier: "GridCell", for: indexPath) as? GridCell else {
            return UICollectionViewCell()
        }

        let info = viewModel.bountyInfo(at: indexPath.row)
        cell.updateUI(info: info)
        return cell
    }
- 각 셀은 어떻게 생겼는지 알려주어야 한다.
- GridCell이라는 클래스의 형태로 cell을 그릴 것이다.
- dequeueReusableCell은 이미 화면에 그린 셀을 다시 그릴때 재사용하겠다는 뜻이고 이를 위해서 해당 셀을 알아볼 수 있도록 GridCell이라는 식별자를 사용하겠다.


- GirdCell을 클릭하여 custom class와 재사용을 위한 identifier를 적어주자.

- 그럼 마지막으로 ui 컴포넌트들과 GridCell의 프로퍼티들의 outlet을 연결하자.
    // UICollectionViewDelegateFlowLayout
    // cell size??
    func collectionView(_ collectionView: UICollectionView, layout collectionViewLayout: UICollectionViewLayout, sizeForItemAt indexPath: IndexPath) -> CGSize {

        let itemSpacing: CGFloat = 10
        let textAreaHeight: CGFloat = 65

        let width: CGFloat = (collectionView.bounds.width - itemSpacing)/2
        let height: CGFloat = width * 10/7 + textAreaHeight
        return CGSize(width: width, height: height)
    }
- cell의 크기도 정해야한다.
- collectionView.bounds로 컬렉션 뷰의 크기를 가져올 수 있다. width를 알고 싶다면 collectionView.bounds.width가 된다.
- 셀의 크기를 CGSize 타입으로 반환해야 한다.
// UICollectionViewDelegate
    // 셀이 클릭되었을때 어쩔거야?
    func collectionView(_ collectionView: UICollectionView, didSelectItemAt indexPath: IndexPath) {
        performSegue(withIdentifier: "showDetail", sender: indexPath.item)
    }
- 마지막은 셀이 클릭되었을 때 동작을 정의한다.
- showDetail이라는 segue를 수행할 것이고 어떤 셀이 눌렸는지 indexPath.item를 보내준다.
    override func prepare(for segue: UIStoryboardSegue, sender: Any?) {
        if segue.identifier == "showDetail" {
            let vc = segue.destination as? DetailViewController
            if let index = sender as? Int {
                let bountyInfo = viewModel.bountyInfo(at: index)
                vc?.viewModel.update(model: bountyInfo)
            }
        }
    }

    override func viewDidLoad() {
        super.viewDidLoad()
    }
}

class GridCell: UICollectionViewCell {
    @IBOutlet weak var imgView: UIImageView!
    @IBOutlet weak var nameLabel: UILabel!
    @IBOutlet weak var bountyLabel: UILabel!

    func updateUI(info: BountyInfo) {
        imgView.image = info.image
        nameLabel.text = info.name
        bountyLabel.text = "\(info.bounty)"
    }
}
- 다음 스크린으로 segueway를 통해 데이터를 넘겨주기 위한 준비 동작과 GridCell의 코드이다.
2 실행결과

'ComputerScience > ios App(Storyboard)' 카테고리의 다른 글
| ios - 18 Animation with ViewProperties (0) | 2021.08.03 |
|---|---|
| ios - 17 Animation with contraints (0) | 2021.08.03 |
| ios - 15 Design Pattern (0) | 2021.08.02 |
| ios - 14 Segue (0) | 2021.07.28 |
| ios - 13 Custom Cell (0) | 2021.07.28 |


